

In this guide
- Why your measurements decide whether the project goes well
- The tools you actually need
- Step 1: Measure the width in three places
- Step 2: Measure the height in three places
- Step 3: Measure the depth of the jamb
- Step 4: Check whether the opening is square
- Common measuring mistakes that cost real money
- When to stop measuring and call a professional
- Frequently asked questions
Most window orders that arrive wrong arrive wrong because someone wrote down the measurement of the glass instead of the rough opening, or wrote down the largest of three numbers instead of the smallest. Learning how to measure for replacement windows takes about ten minutes per opening with a steel tape and a level, and the math saves you the worst phone call in any renovation: the one where the factory tells you the unit cannot ship because the dimensions are wrong. If you are planning a project, our window replacement service in Toronto includes a final measurement visit before any factory order goes in, but accurate homeowner numbers up front make every quote more useful.
Three measurements per opening, smallest number always wins, and round down. That is the entire formula. The rest of this guide is the how and the why so you do not lose track of which number to write down or which corner you are measuring from.
Why Your Measurements Decide Whether The Project Goes Well
Replacement windows are factory-built to order. They cannot be trimmed in the field the way a piece of door casing can. If your numbers are off by half an inch in the wrong direction, the unit either will not fit through the rough opening at all, or it will fit so snugly that an installer cannot leave the 1/4 inch shim gap on each side that level installation requires. Either way, the unit goes back to the factory or sits in your garage while a new one gets built.
Factory remake fees on a single window run from $400 to $900 in 2026 in most of Canada. On a 12-window job, one wrong measurement is the difference between profitable and ugly. That is why every supplier sends someone to take final measurements themselves before the order goes in, and why those measurements get signed off on a sheet that the customer keeps a copy of. Your job at the homeowner stage is to give a useful first cut, spot openings that look out of square, and know enough to push back if a sales rep tells you something that does not match what you can see with a tape and level.
The Tools You Actually Need
You do not need a laser distance meter or anything fancy. Three things, and you probably already own all of them.
- A 25-foot steel tape measure. The cheap fabric tapes from a sewing kit are not flat enough across a 60-inch run to give a reliable number. Spend the $25 on a Stanley FatMax or equivalent.
- A 24-inch level. You will use it to check whether the sill is sloped or whether the side jambs are plumb. A 9-inch torpedo level is too short to read accurately across a full window opening.
- A pen and a clipboard. Phone notes are fine in theory and a problem in practice because you will mistype 35 7/8 as 35 5/8 the first time you try, and you will not catch it until the factory ships the wrong unit. Write each number on paper at the window itself.
Did you know?
Most factory orders are built to within 1/16 inch of the dimensions on the order sheet. That is tighter than the width of a pencil line. The window is shipped 1/2 inch smaller than your provided rough opening on every side so the installer has room to shim it level. If you provide a rough opening that is 1/4 inch wider than reality, your shim space disappears.
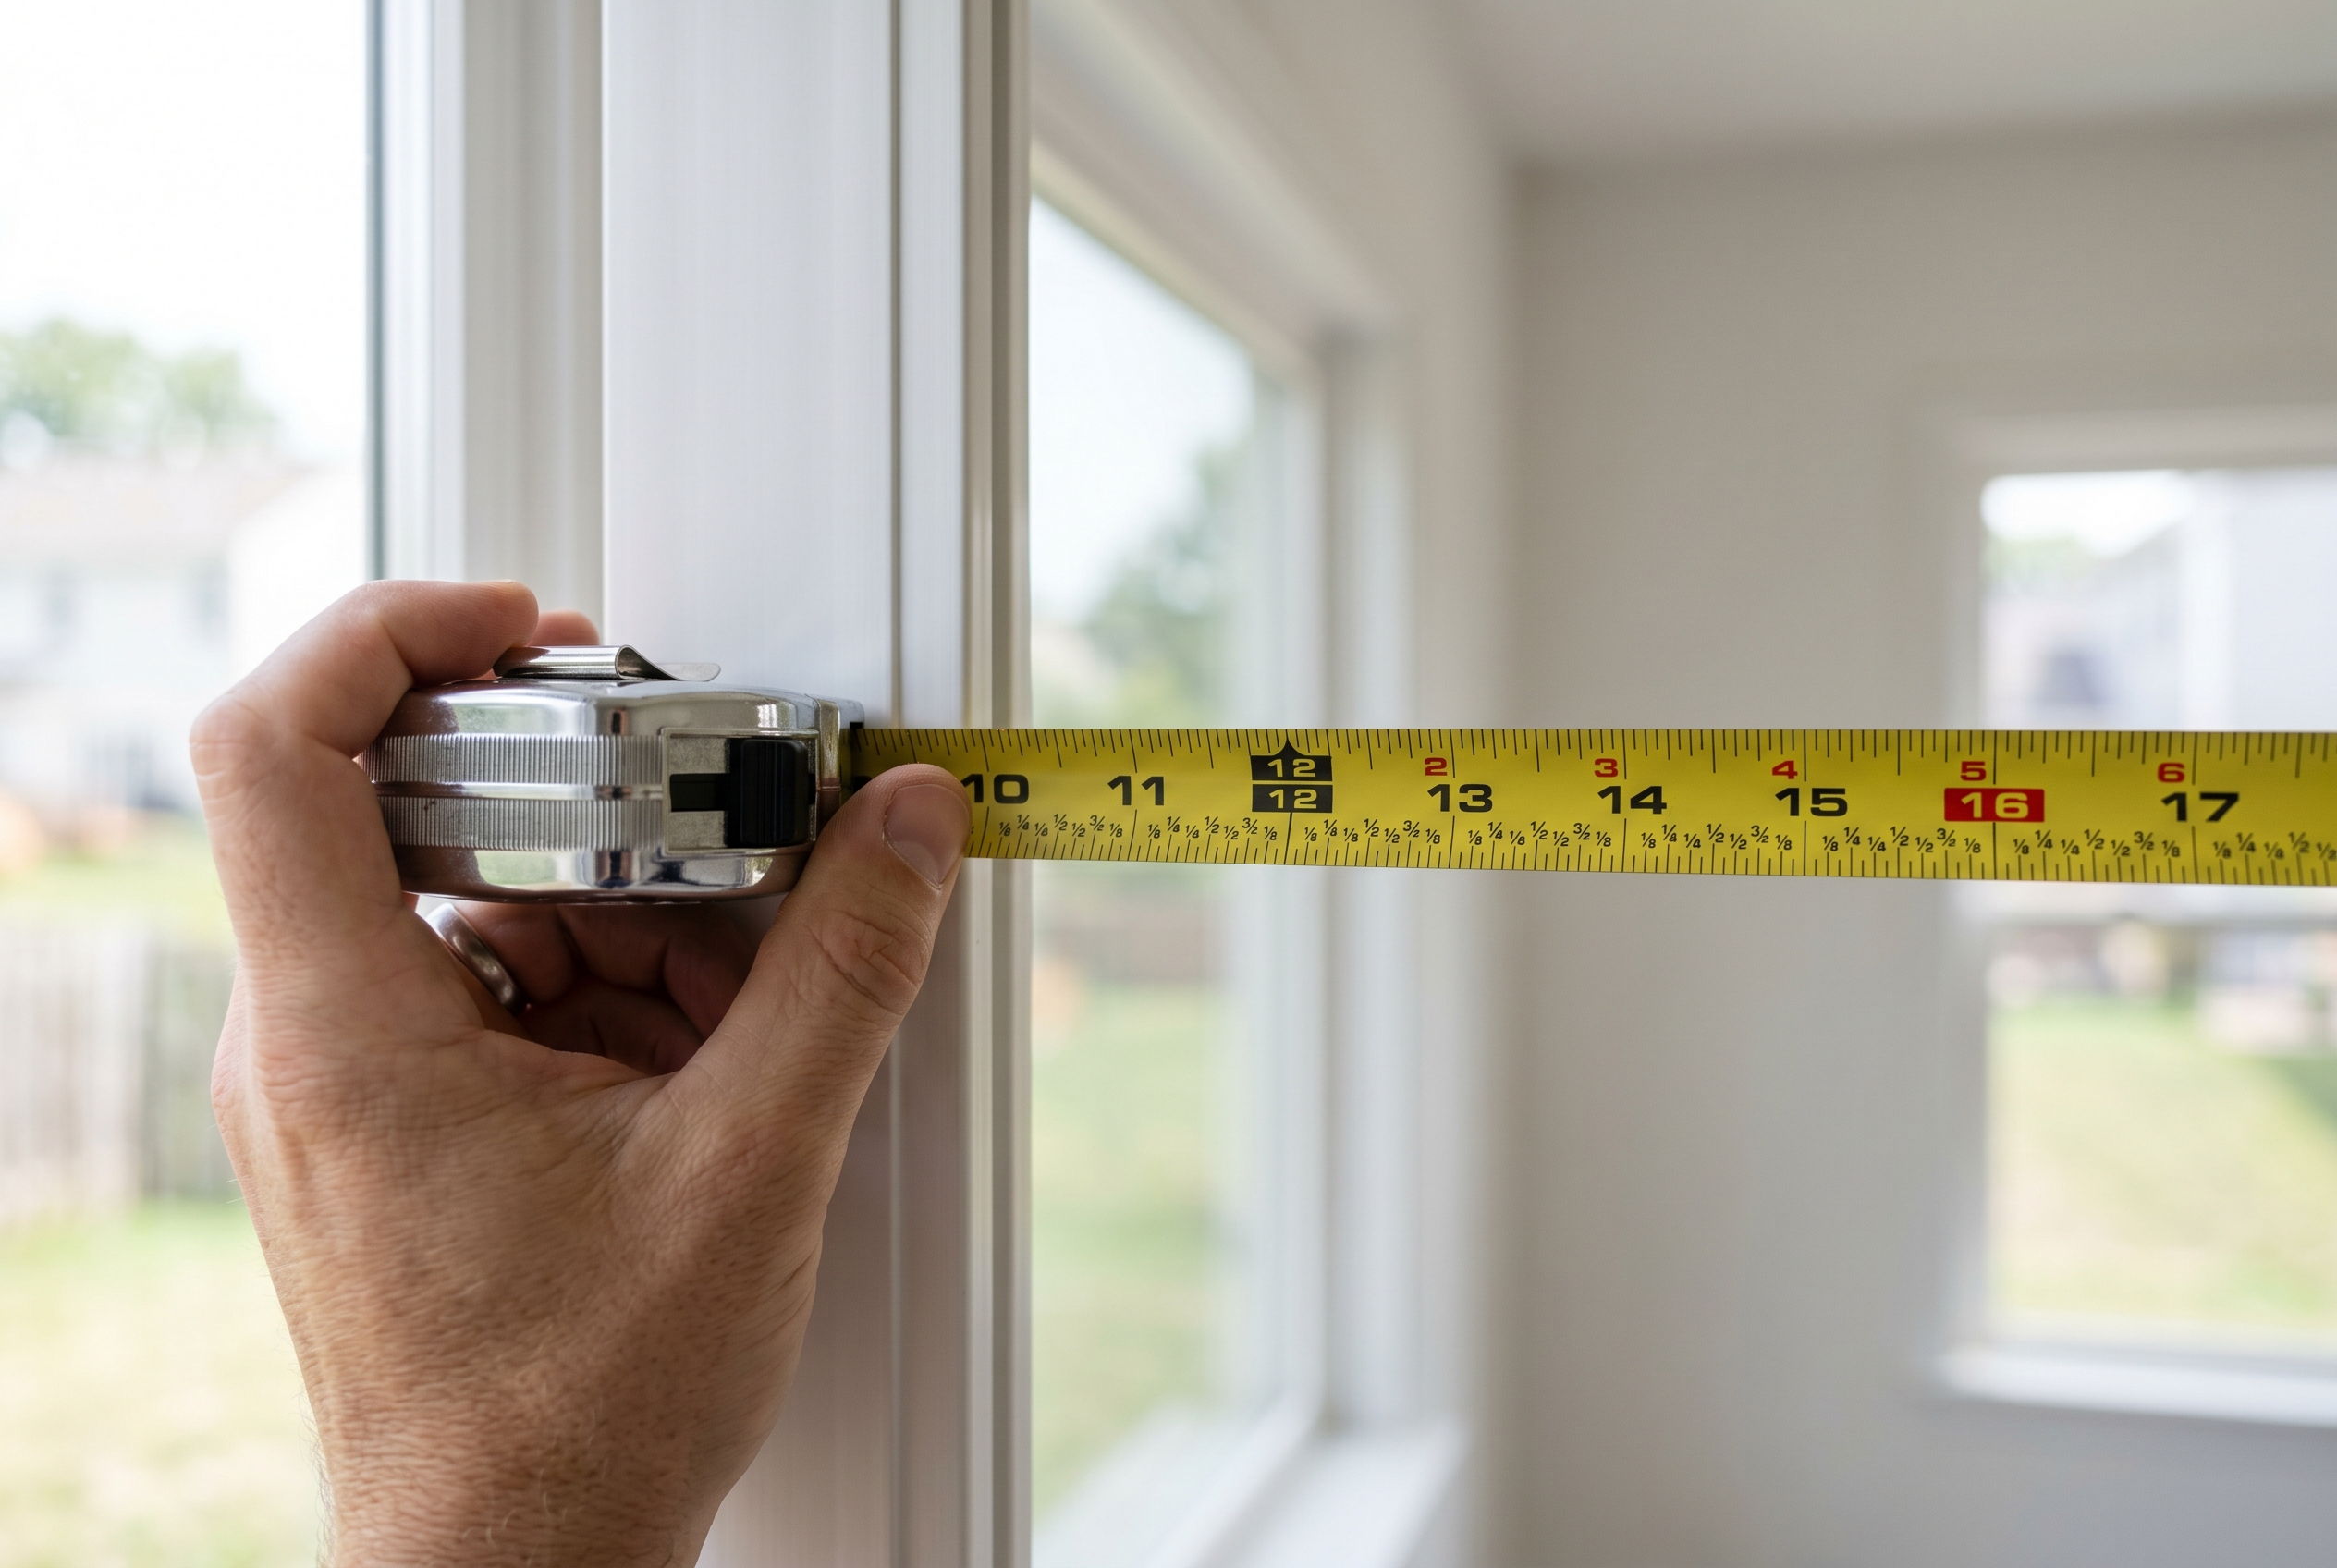
Step 1: Measure the width in three places
Open the window if it operates. Run your tape from the inside face of the left jamb across to the inside face of the right jamb. The jamb is the vertical wood or vinyl that the sash slides against. Take this measurement at three points: roughly 6 inches from the top of the opening, at the centre, and roughly 6 inches from the bottom.
Write all three numbers down. The smallest of the three is the one you give to the supplier. If your three numbers are 35 7/8, 36, and 35 3/4, you write 35 3/4. The reason you take three numbers is that older homes settle, and an opening that is 36 inches at the top might be 35 5/8 at the bottom. Order to the smallest dimension and the unit fits everywhere. Order to the largest and it fits at the top but jams at the bottom.
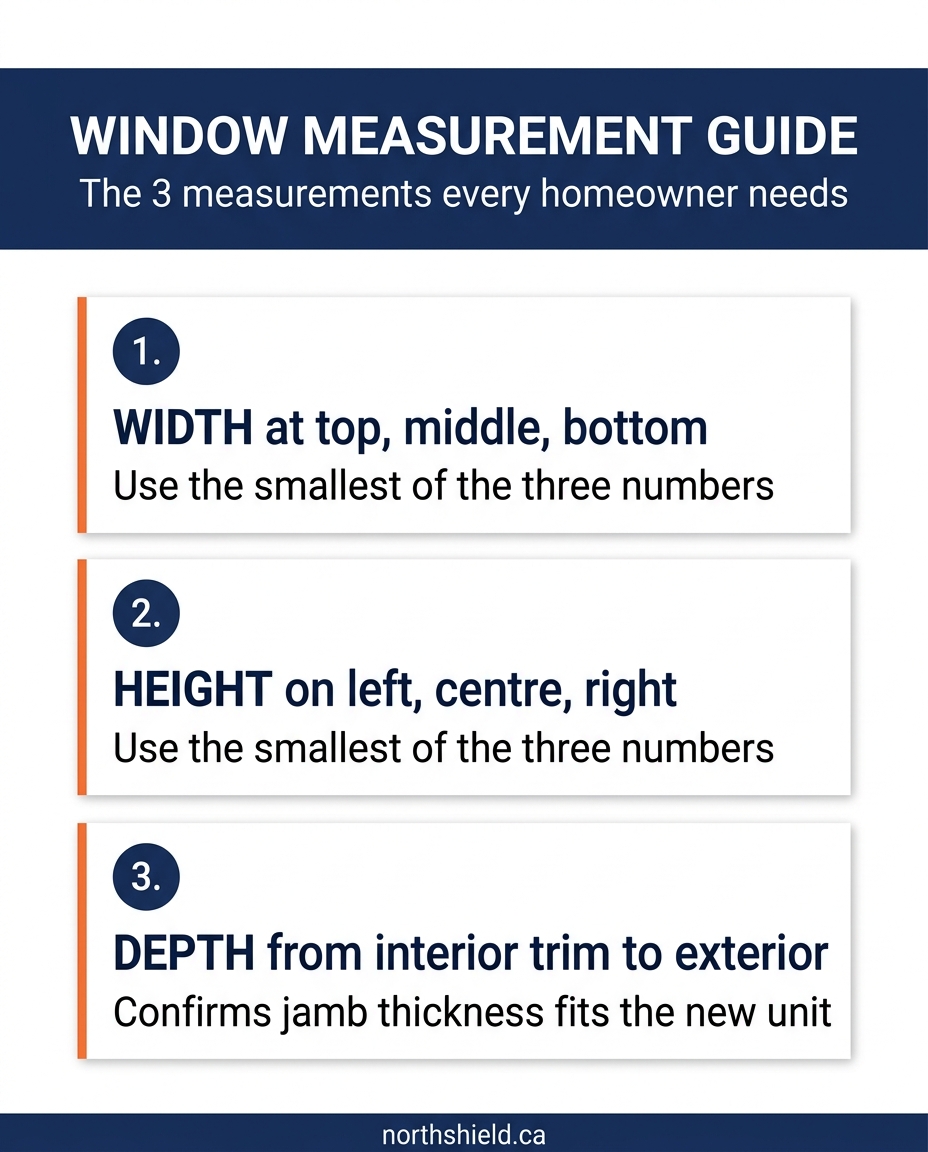
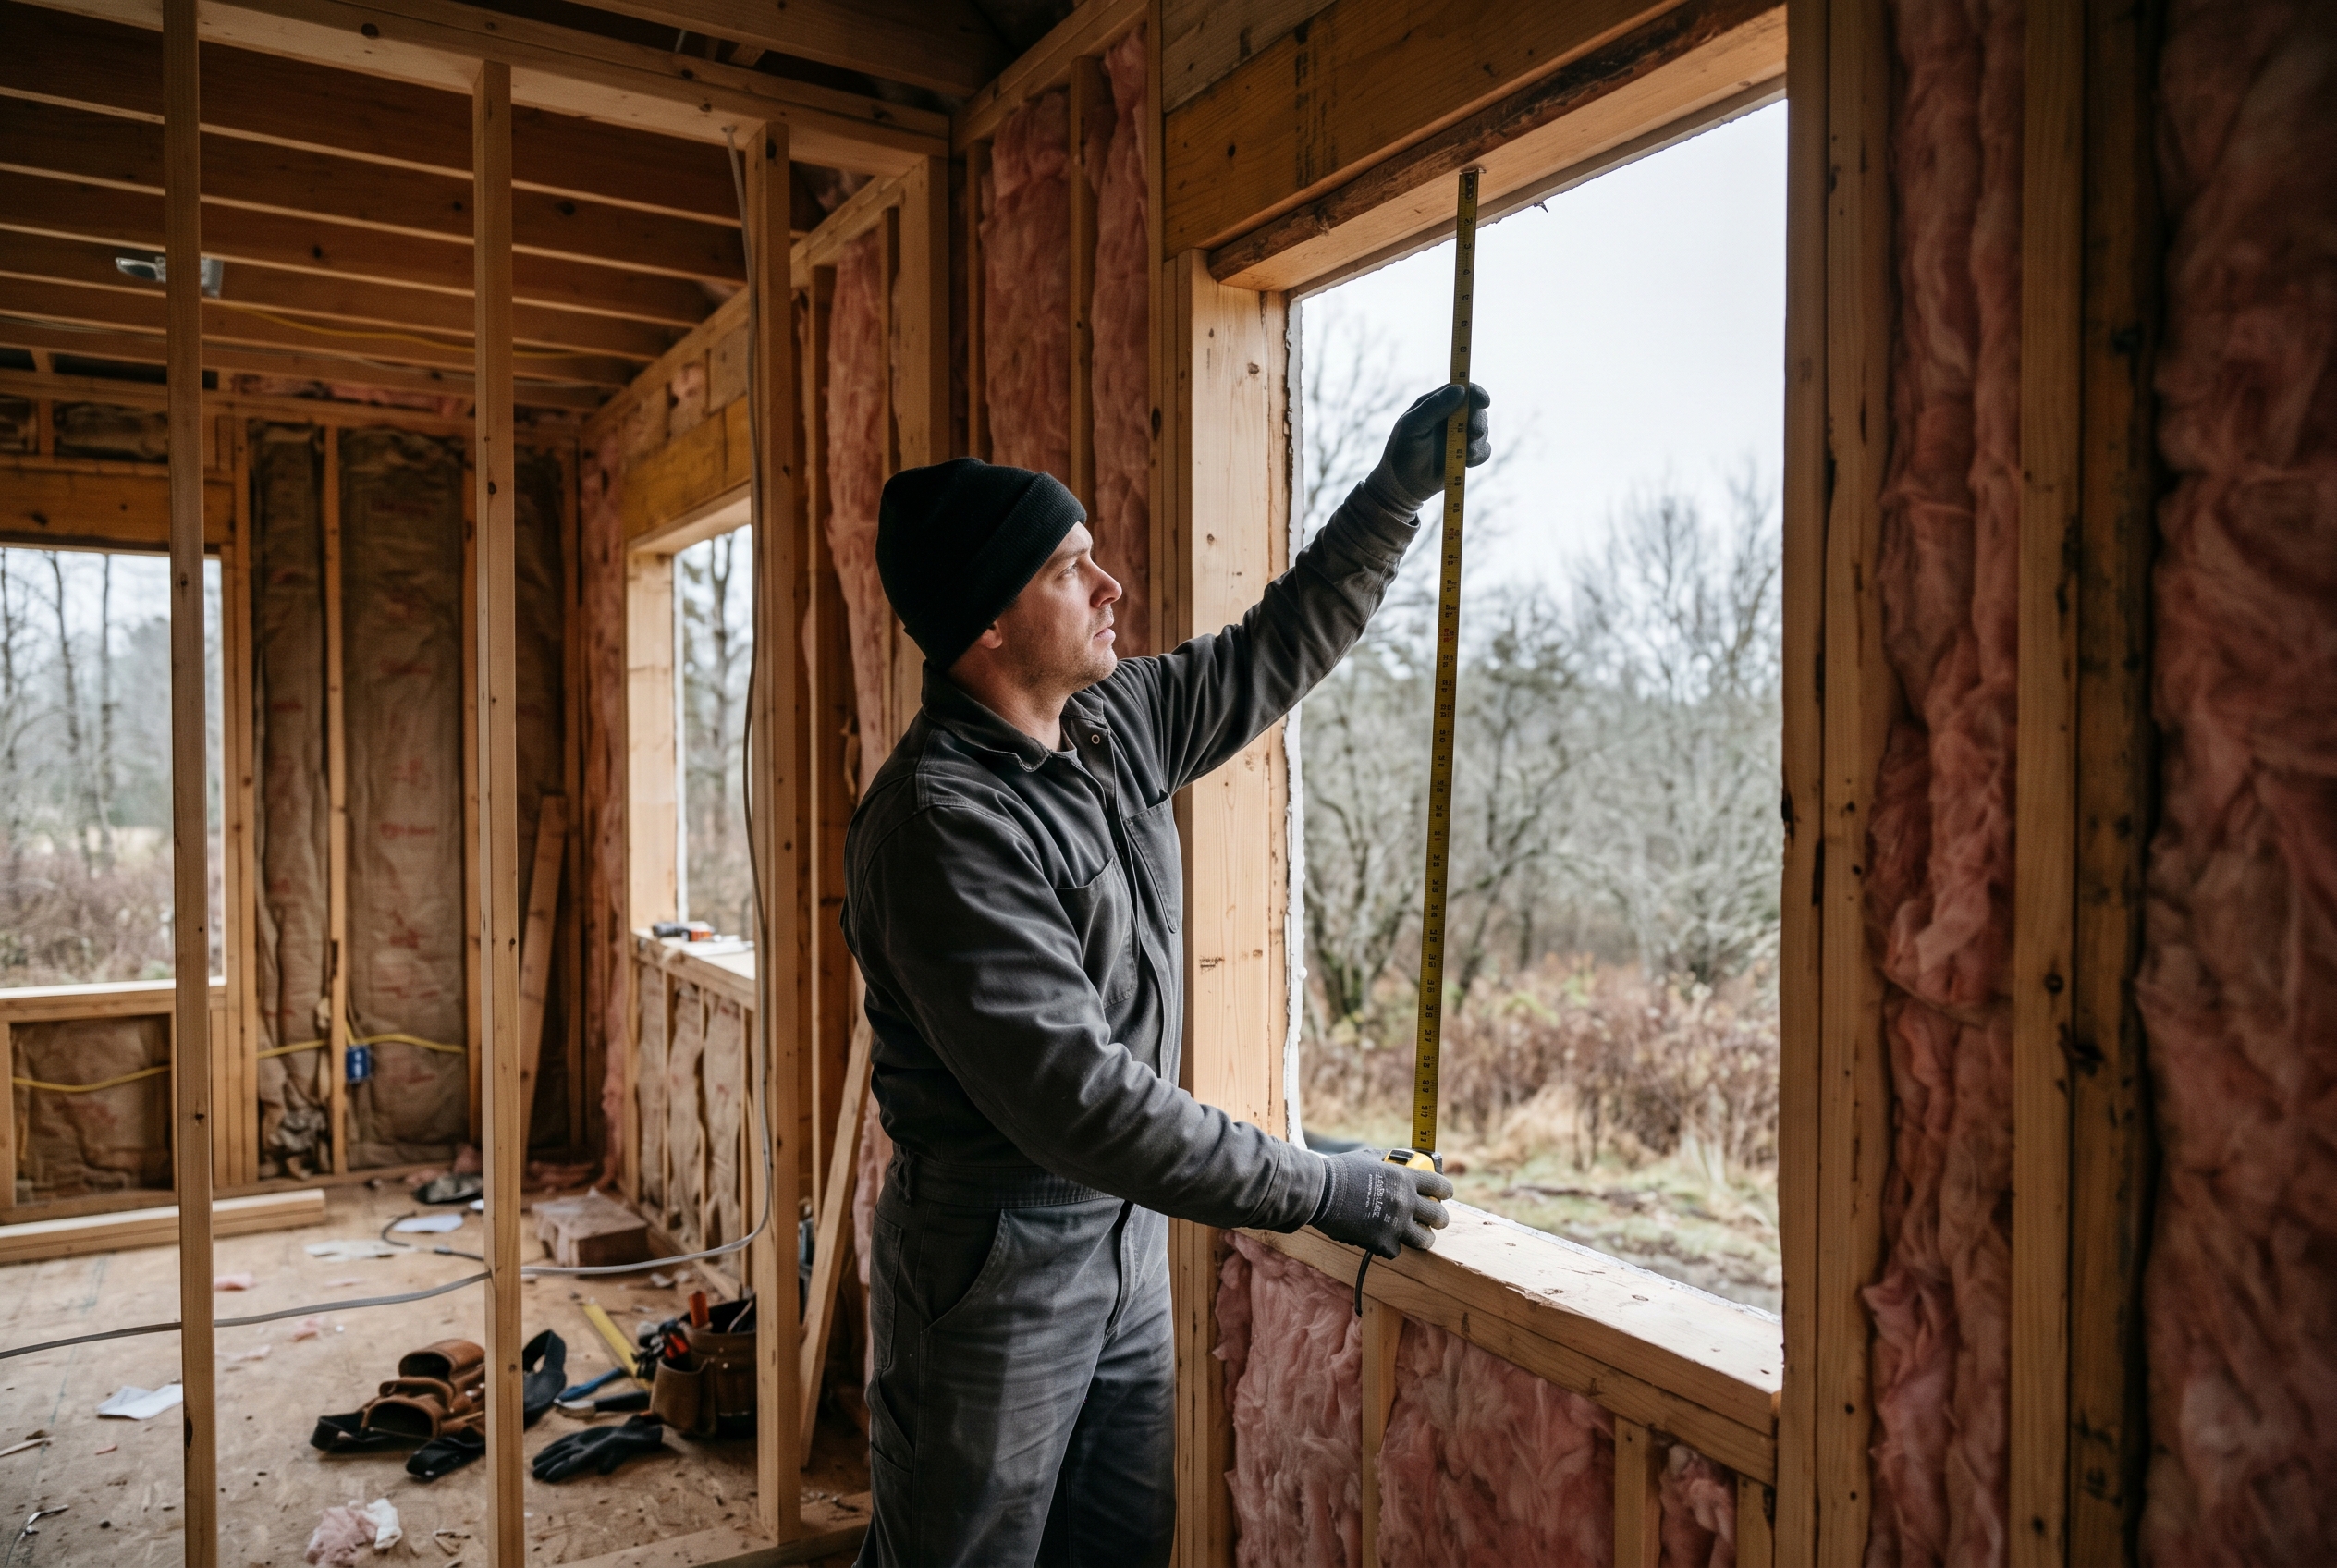
Step 2: Measure The Height in Three Places
Same approach, rotated 90 degrees. Run the tape vertically from the inside face of the head jamb at the top of the opening down to the top of the sill. Take three readings: roughly 4 inches from the left side of the opening, at the centre, and roughly 4 inches from the right side.
Two notes that catch people. First, measure to the top of the sill, not to the bottom of the sill apron, the angled wood piece beneath the window on the inside. The apron is decorative and is not part of the rough opening. Second, the head jamb is sometimes recessed behind a header trim. Measure to the wood, not to the trim. Smallest of three numbers wins the same way the width did.
Pro tip
If the bottom of the sill is sloped (most are sloped about 10 to 14 degrees toward the exterior to shed water), measure to the highest point of the sill on the interior side. The new unit’s bottom rail sits on a level shimmed line above the slope, so the dimension that matters is the highest point your tape can rest on, not the deepest point of the slope.
Step 3: Measure the Depth of the Jamb
This is the one most homeowners forget. New windows are sized to fit a specific jamb depth, which is the dimension from the inside face of the interior trim to the outside face of the exterior trim. Most older Canadian homes built before 1990 have jamb depths between 4 and 1/2 inches and 5 and 1/4 inches. Newer homes with thicker insulation and exterior cladding can run 6 and 1/2 inches or deeper.
Use a small ruler or a tape measure pressed flat against the side jamb. The number tells the factory which jamb extension kit to ship with the window so the unit sits flush on both sides. Get this wrong and either the inside trim does not meet the wall, or the unit projects past the exterior cladding and the caulk joint will not seal properly. A useful tip from our Winnipeg window installation team: depth often varies by 1/4 inch from window to window in a single house, especially around recently renovated rooms.
Step 4: Check Whether The Opening is Square
A square opening has identical diagonal measurements. Stretch your tape from the top-left corner of the opening to the bottom-right corner and write the number down. Do the same from the top-right to the bottom-left. If the two diagonals match within 1/4 inch, the opening is square enough that any standard window can install without trouble.
If the diagonals are different by 1/2 inch or more, the opening is racked and the new unit will need extra shimming, wider casing, or in some cases the framer needs to come back and correct the rough opening before the window can be installed. This is worth knowing before you sign an order. Most installers will look at it and either flag the extra labour, or quote a full-frame replacement instead of an insert.
Red Flag
If your diagonals differ by more than 3/4 inch, or if your width measurement at the top differs from the bottom by more than 1 inch, the rough framing has shifted significantly. Do not order until a contractor or structural inspector has looked at the opening. A racked opening usually means the header above the window has dropped or the studs around the opening have rotated. Installing a new window on top of that without correcting the framing means the new unit will not seal properly and the seal failure can show up within a year.
Common Measuring Mistakes That Cost Real Money
The factory remake fee for a wrong-size unit runs expensive, plus 4 to 8 weeks of waiting for the corrected order. Multiply that by a 12-window job and the math gets ugly fast. Here are the five mistakes that cause most of those remakes.
- Measuring to the glass instead of the inside of the frame. Glass is set 1 to 2 inches inside the frame. Measure to the glass and your numbers come out 2 to 4 inches too small. The unit you order will not fill the opening and you will have a 2-inch reveal of bare framing on every side.
- Writing down the largest of three numbers. If 36, 36 and 1/8, and 35 3/4 are your three width readings, the answer is 35 3/4 and not 36 and 1/8. The new unit needs to fit the tightest dimension of the opening.
- Measuring with the window closed and the sash in the way. The sash takes up space inside the frame. Open the window or remove the storm panel before measuring or your numbers reflect the daylight opening, which is 2 to 4 inches smaller than the actual frame opening.
- Reading the tape at an angle. If you stand to one side and look at the tape, parallax adds or subtracts up to 1/4 inch on a 36-inch run. Get your eye perpendicular to the tape at the point you are reading.
- Forgetting which window had which dimensions. Number every opening with masking tape and a marker before you measure. On a job with 8 or more windows, the opening you measured an hour ago no longer looks unique by the time you get back to the kitchen.
When to Stop Measuring and Call a Professional
Some openings are not worth measuring yourself, even for a planning estimate. If you see any of these, skip ahead to a measurement visit by a qualified installer.
- Bay or bow windows, where the unit is multiple panels at angles. The geometry adds three or four extra dimensions and any error compounds across panels.
- Garden windows, the small projecting greenhouse-style units over a kitchen sink. Depth and bracket placement matter more than the wall opening size.
- Awning, hopper, or specialty-shape windows like half-rounds or octagons. Templates from the factory are usually required.
- Any opening with rot or water damage visible at the sill or jamb. Measuring will not save you. The opening needs repair before any new unit goes in, and the new dimensions only get set after that repair.
- Multi-mulled units, where two or three windows are joined together in a single frame. The gap and the bracket between units changes the math.
For a standard double-hung, casement, slider, or fixed window in a single opening, your measurements are useful for budgeting and they signal to the supplier that you understand the work. The supplier still takes their own measurements before any factory order goes in. That is the formal sign-off, and it is the number that ends up on the contract.
One Canadian standard worth knowing about: replacement units that meet ENERGY STAR Canada certification are sized to specific U-factor and air-leakage performance numbers, and the factory cannot adjust those by changing dimensions. Order accuracy matters there because a unit that is 1/4 inch off on a critical dimension cannot be field-modified without voiding the certification.
Please note: The information in this guide is for general homeowner reference. NorthShield is not responsible for any cost or delay resulting from measurements taken using this method. All factory orders are built to dimensions taken and signed off by a qualified installer or supplier representative, not by the homeowner. If you have any doubt about an opening, get a professional measurement before ordering. Confirm specifications with a licensed professional for your specific situation.
Download the free measuring checklist
Save this 1-page checklist as a PDF and bring it with you to every opening you measure.
Window Measurement Checklist (PDF)Frequently Asked Questions
Sources and References
- Natural Resources Canada: ENERGY STAR Canada window certification overview
- National Research Council Canada: National Research Council Codes Canada window standards
- Canadian Standards Association: CSA A440 Canadian Supplement to fenestration standards

Written by
Paul D.
Window & Door Installation Lead
Paul is a window and door installation professional based in Winnipeg with over 15 years of experience in residential renovation across Manitoba. He specializes in cold-climate window selection, vinyl frame systems, and energy-efficient upgrades for older homes built to survive Winnipeg's extreme winters.